I did these about a year or more ago, but haven't shared them on my blog.
These rockets and stars are what brighten my older boy's room. I wanted to brighten their room, especially as in our old house we had a big blank wall, and since we rent, we of course couldn't just paint it or do anything drastic, so I chose to be arty :)
I found, on ebay, the MDF shapes of the rockets and stars. (I have since found a new website where I can get all sorts of MDF shapes, words and even puzzles to paint)
I then painted the stars and added glitter and varnish.
For the rockets, I used their quilt covers as inspiration (they are covered in rocket ships) and designed the rockets to match. Next time though, I won't put as many circles on - they are hard to paint!
I then did the outlines of shapes in black nikko pen (much easier and neater than painting) and gave them a coat of spray varnish.
The boys love them and it does brighten their room. They are held on the wall by blu tac, since they are so light.
If you would like something done for your children's wall, please let me know.
A showcase of my sewing, cross stitch and other artwork that I create as well as little stories about my life as a stay at home Mum of 3 busy boys
Thursday, June 17, 2010
Friday, June 4, 2010
Craft Markets on Saturday
Hi everyone,
Don't forget to come and see me at the Stafford Baptist Church craft markets tomorrow, Saturday 5th June from 8am - 12pm. I'll have all of my items there, plus some that haven't made it onto the computer yet. There are lots of other lovely stalls there also, as well as a cheap but yummy cafe and an op shop.
Friday, May 28, 2010
Dress Up Skirt & Scarf & Girls Pyjamas
How cute is this little skirt and scarf? The photo really doesn't do it justice though. I found this rainbow sequened fabric at the fabric shop the other day and just couldn't resist! I have 2 of these sets available for sale for $6 each set. And if they sell or you would like a plain colour, please let me know and I am happy to make more for you.
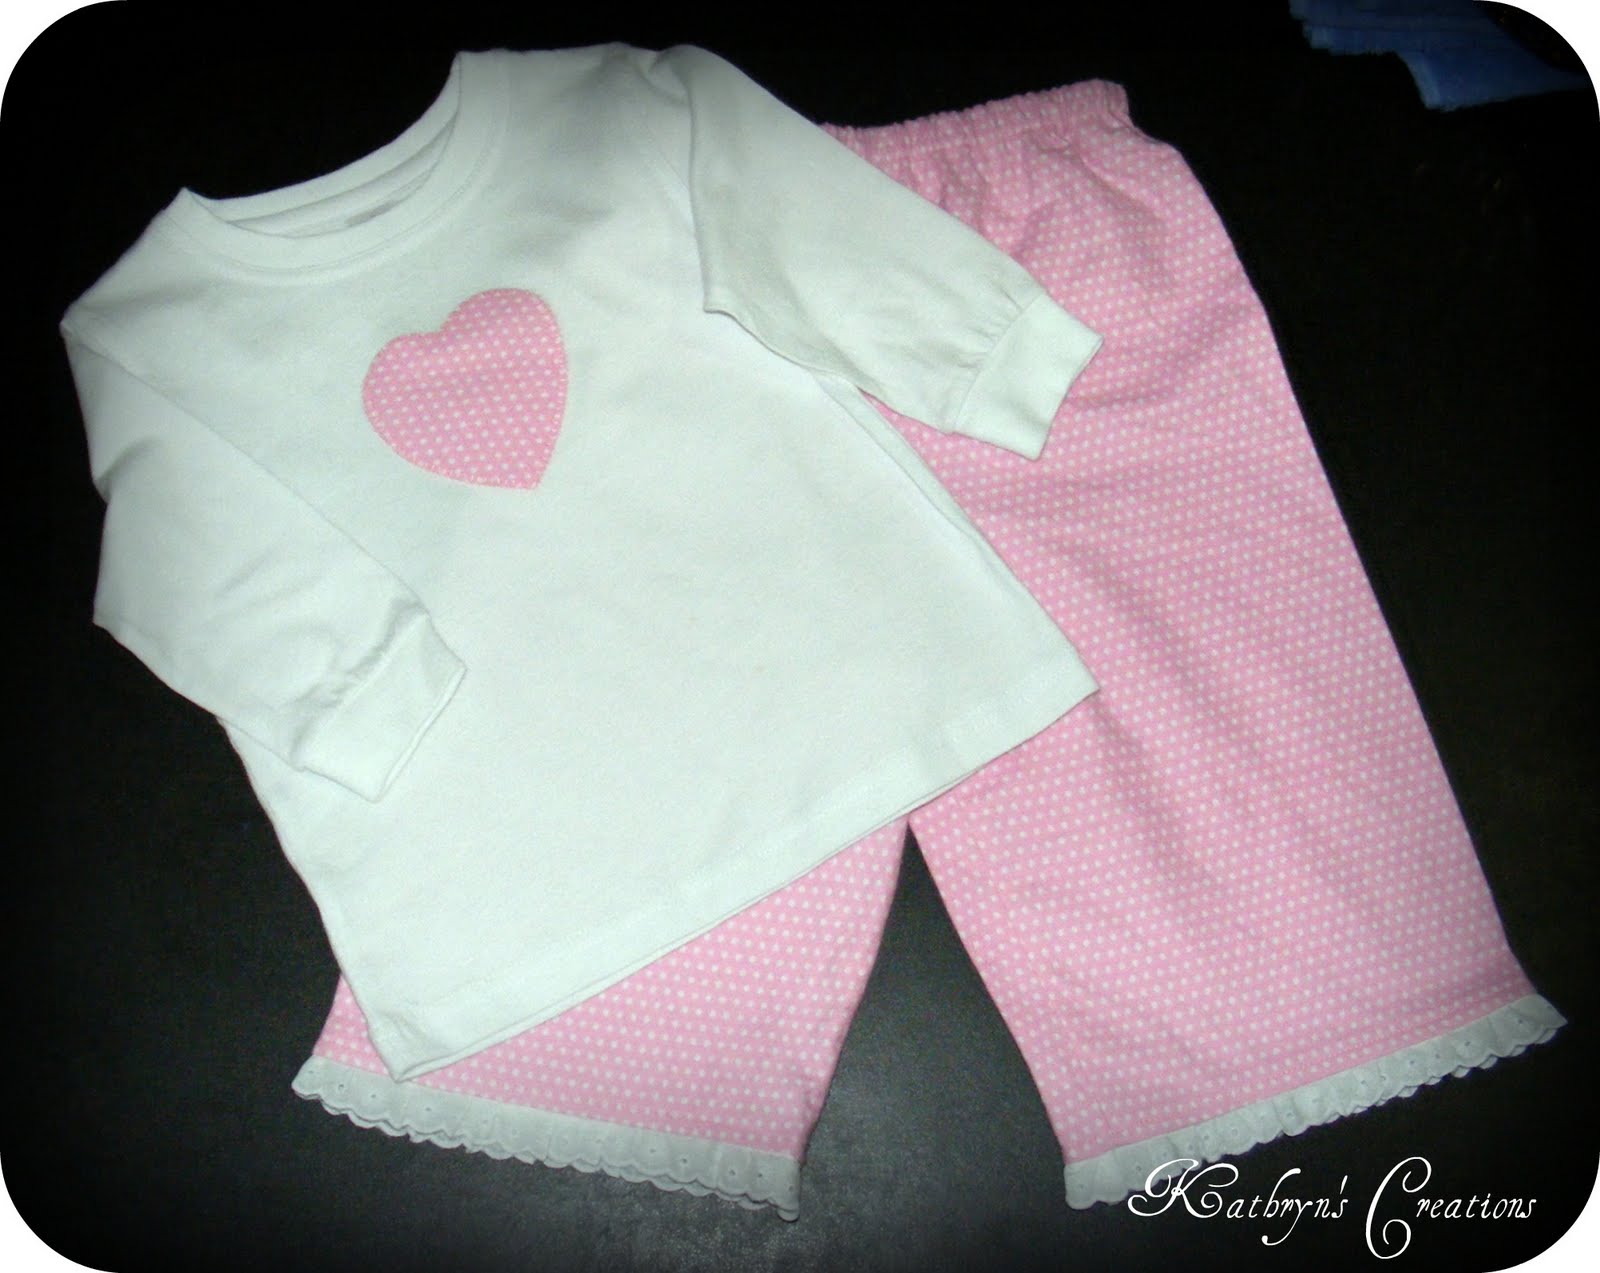
I have also made some more pyjamas. I just wish I had a little girl to dress her in these! I have made them a size 1 and the pants have some broderie anglaise lace at the bottom which looks so cute! The top has a matching heart appliqued on. They are made from pink with white spots flannellette. They are selling for $10 a set and I can make another set the same if you like as I still have heaps of this flannellette left. I also have the same white spots on aqua flannellette too.
Wednesday, May 19, 2010
Buttlerfly Bag
I must admit that I am very proud of my achievement in making this bag. I bought the pattern 2 years ago while on holidays and every so often I get it out of my pattern drawer and think ' I really should get some nice fabric to make that' then something else comes up and I put it away for a while longer. So when we went to the coast for a few days early in May, I decided to take my Mum with me to find some fabric and all the bits and bobs to make it. This, is the outcome. It was fiddly, with quite a few small bits to sew, like the loops for the bow etc, but suprisingly easy. I only had to unpick one lot of sewing, when I was sewing the base to the bag, I got a little bit caught up, but was impressed that it was only one lot of unpicking :) The bag is supposed to have stiff handles, but I don't like hard handles on my bony shoulders, so I just put interfacing in them instead. The lining of the bag is the same as the bow and also has a good sized pocket. The bag I have done is the big size, but there is also a smaller size. If you are interested in ordering a bag, in your choice or my choice of fabric, please let me know. Prices will be from $50 for the smaller bag, and from $65 for the large one.
Tuesday, May 11, 2010
How to Make a Drawer String Bag
After my last post showing you my drawer string bags, I had a request to show how to make them, so here you are :) I appologise for some of the photos, I hope they help you though.
Firstly, I find a piece of fabric about the size I want the bag. You can make them any size you wish. Some of my bags are long pieces folded in half, so the fold is at the base of the bag. This one is made from 2 pieces of fabric, so you will need to sew the base and sides. I use about 1cm - 1.5cm seams and then either overlock or zigzag stitch the seams.

The photo to the left is the cut fabric, face them right sides together to sew. The photo to the right (with my son's hand) shows the sewn seams. I also snip the corners at the base if you are sewing the base so the corners sit nicely. No need to do this if it is folded.

I also overlock/zigzag around the top raw edge. Then fold over about 2-3cm to the inside and iron as shown on the left. Sew about 1/2cm away from the raw edge of fabric, leaving about 2-3cm gap between the start and end of stitching. I have tried to show this in the photo on the right. This is to allow the cord/ribbon to be threaded through.

Lay the bag flat and measure the cord/ribbon/rope along the top twice (to do the circumference) and add about 3-4 cm extra for the knot.
Loop one end over if using cord and attach a saftey pin. This helps you guide the cord through the fabric. When the cord is through, take the pin out and tie a knot in the end and trim the ends evenly. Turn the bag inside out, iren seams and there you go :)
I hope this is easy to follow, if you have any problems or questions please let me know :)
You can use pretty much any fabric you choose for these. If you want a bag for wet/damp items, you could use that backed fabric used for curtains, or a coated fabric. I saw some fabric at Spotlight the other day that was like what spray jackets are made out of, so you could even use that. This bag is just cotton. You can use plains or patterns. On my boy's bags I have made them out of flannellette that was left over from some pj's I made them, then I sewed a patch of plain fabric on and used fabric paint to put their names on. For my son's kindy sheet bag, I used some plain flannellette and cut out the letters of his name in a matching patterned flannellette that I had used to trim his kindy sheet with and attached them with flisofix (like double sided iron on interfacing) and fabric painted around the edges. The options are endless. Enjoy!
Firstly, I find a piece of fabric about the size I want the bag. You can make them any size you wish. Some of my bags are long pieces folded in half, so the fold is at the base of the bag. This one is made from 2 pieces of fabric, so you will need to sew the base and sides. I use about 1cm - 1.5cm seams and then either overlock or zigzag stitch the seams.
The photo to the left is the cut fabric, face them right sides together to sew. The photo to the right (with my son's hand) shows the sewn seams. I also snip the corners at the base if you are sewing the base so the corners sit nicely. No need to do this if it is folded.
I also overlock/zigzag around the top raw edge. Then fold over about 2-3cm to the inside and iron as shown on the left. Sew about 1/2cm away from the raw edge of fabric, leaving about 2-3cm gap between the start and end of stitching. I have tried to show this in the photo on the right. This is to allow the cord/ribbon to be threaded through.
Lay the bag flat and measure the cord/ribbon/rope along the top twice (to do the circumference) and add about 3-4 cm extra for the knot.
Loop one end over if using cord and attach a saftey pin. This helps you guide the cord through the fabric. When the cord is through, take the pin out and tie a knot in the end and trim the ends evenly. Turn the bag inside out, iren seams and there you go :)
I hope this is easy to follow, if you have any problems or questions please let me know :)
You can use pretty much any fabric you choose for these. If you want a bag for wet/damp items, you could use that backed fabric used for curtains, or a coated fabric. I saw some fabric at Spotlight the other day that was like what spray jackets are made out of, so you could even use that. This bag is just cotton. You can use plains or patterns. On my boy's bags I have made them out of flannellette that was left over from some pj's I made them, then I sewed a patch of plain fabric on and used fabric paint to put their names on. For my son's kindy sheet bag, I used some plain flannellette and cut out the letters of his name in a matching patterned flannellette that I had used to trim his kindy sheet with and attached them with flisofix (like double sided iron on interfacing) and fabric painted around the edges. The options are endless. Enjoy!
Friday, April 30, 2010
Craft Markets
Hi all, just a reminder that I have all my items for sale at Stafford Baptist Church Craft Markets tomorrow (Saturday 1st May) between 8am - 12pm. Come along for great bargains for Mother's Day! Stay and enjoy a cuppa at the cafe - very reasonably priced.
Monday, April 26, 2010
Fellow Blogger Giveaways
I have just been directed to Michelle Dennis Evans' blog and there is a wonderful variety of topic and as a bonus she is having a great giveaway. So pop over to her page to check her out :)
http://michelledevans.blogspot.com
Subscribe to:
Posts (Atom)